
At IRRI, I have been able to expand my knowledge of Golden Rice breeding and the carotenoid extraction experiments that are utilized to calculate its levels of beta-carotene.
This week, I along with 2 undergraduate interns from San Pablo had the opportunity to visit the transgenic unit where Golden Rice and HIZER (high iron and zinc) varieties are grown. The first observation that comes to mind would be that there are many security measures put in place in order for the detainment of the entrance of other seed varieties and for the ceasement of Golden Rice materials extending beyond the transgenic facility. Some examples include the washing of shoe soles when entering and exiting as well as all drains having mesh. Also, for the disposal of GR2E materials, seeds are boiled beforehand for 15 minutes.

Kuya Dalvin, Ate Mercy, and Kuya Amery shared a bit about the history of Golden Rice and the process of breeding varieties for the expression of the GR2E gene (relation with carotenoid content). When it comes to picking wild-type varieties for such crosses, it is vital to choose varieties most well-known and preferred by farmers. For instance, GR2E was initially introgressed into 3 high-yielding varieties BR29 (Bangladesh), RC82 (Philippines), and IR64 (Philippines).

It is not effective for progenies to only express the Gr2E gene because one instead is aiming to stack trains indicating that the traits of the wild-type parents are equally as significant. To make certain of this, parents are always planted for comparisons between progeny and wild-type parents in regards to flowering dates, number of tillers, and other agronomic parameters. There should be little to no deviation between these characteristics. Before a generation of seeds are planted in the screen house, they are dried for 3 days at 50 degrees Celsius for better germination. This process breaks dormancy. GR2E lines that are transferred from the screen house to the field are fixed (normally become fixed by generation BC5F3). The transgenic division works with IRRI’s seed health unit for the redirecting of seeds to multilocation trials.
The conduction of a field study still needs to occur by a third party group to more accurately conclude the effects of Golden Rice consumption (how much are vitamin A levels in people’s blood being elevated). There is constant coordination between Excellence Through Stewardship, the Bureau of Planting, and IRRI’s biosafety office. Currently, the public has been expressing some uncertainty regarding Golden Rice. For instance, on April 18, 2023, a Writ of Kalikasan was issued. It sought to stop the release of genetically modified rice.
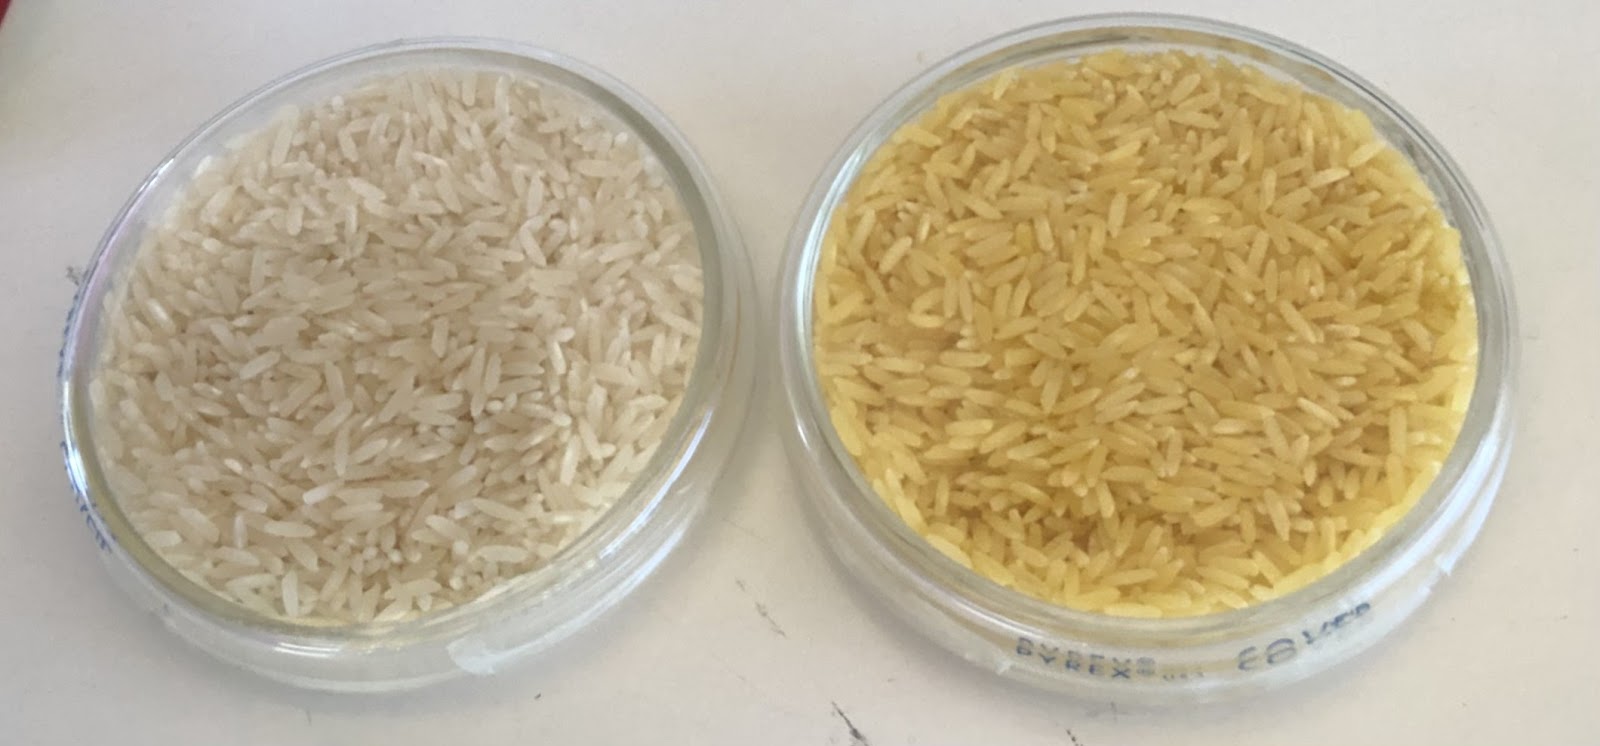
The carotenoid content of Golden Rice was derived from genes of daffodil, maize, and soil bacterium E. uredovora. Golden rice provides up to 50% of the estimated average requirement for vitamin A in young children. Vitamin A deficiency can cause blindness, poor growth, or even death most oftentimes in women and children. Beta-carotene, a type of carotenoid, is a precursor of vitamin A. Carotenoids support the immune system and wound healing process, protect against UV radiation, and increased carotenoid content in the daily diet may reduce the risk of chronic conditions. They are also linked to antioxidant, anti-inflammatory, and anticancer effects. Carotenoid beta-carotene in particular is a precursor of vitamin A. The carotenoid content of Golden Rice is extracted and quantified every 2 months after harvest. By working with polished seeds in comparison to un-polished seeds, you can extract the accurate amount of carotenoid.
In the carotenoid extraction laboratory, under the supervision of Ate Crystal and Ate Elaine, I was able to work with 7-month samples and compare my results to accurate results completed in the past. There is much preparation that occurs before samples are taken out of a -20 degree C storage unit. 15 ml tubes and microtubules are placed in holders and labeled in accordance with the number of samples being tested plus the number of replicates. A water bath is turned on and set to heat up to 50 degrees C. VIS682A stock dye is vortexed and then diluted (2 microliters of dye, 9.8 ml of acetone). This diluted due is utilized to set up a range that will be used later to check the accuracy of sample absorbance readings. 100 microliters of dye are placed into 3 microtubes, each tube is centrifuged, and then 1 ml of acetone is added to each. Before these samples are read by the spectrophotometer, a blank of acetone is read. For each of the 3 controls, one is aiming for an absorbance of around 0.4 at a wavelength of 680 nm. After the readings/absorbance of the samples are recorded, they are summed together. This sum is multiplied by 80% in order to establish the lower half of the range. The sum is then multiplied by 1.09% in order to establish the higher half of the range (range ex: 0.343 to 0.468).
After preparation, then samples are taken out of the freezer. However, oftentimes, if the samples one is working with are heterozygous, seed sorting may need to occur in which only yellow polished seeds are kept to be tested. Into labeled grinder tubes, about 2 grams of each sample are placed with 2 metal balls. These tubes are then put into a wood mold and grinded at 10 min intervals for a total of 30 minutes. After the samples were taken out, I noticed that they were chalky in appearance/texture and were lighter in yellow hue compared to the un-grinded seeds.
Then, each sample is weighed on an analytical balance. For the experiment, 0.5 grams of each is needed. Also, since 8 or 7-month-old Philrice samples are replicated 3 times and 2-month-old Indonesian lines are replicated 2 times, the weighing process is thus repeated according to such. The weight is written down in a spreadsheet and then the sample is placed into a corresponding 15 ml tube. Leftover samples are placed back into the grinder tube and stored.
2 ml of water is added to each 15 ml tube and sonification of each sample is conducted. Sonification is the addition of pressure and heat to a solution. When sonifying, tubes are moved upward and in a circular motion to ensure the mixing of the samples. When sonified, each sample becomes closer to a white color than yellow. The machine is cleaned in between each sample. I noticed that sonifying samples with added acetone can be a bit challenging because the solution hardens although it needs to be mixed.


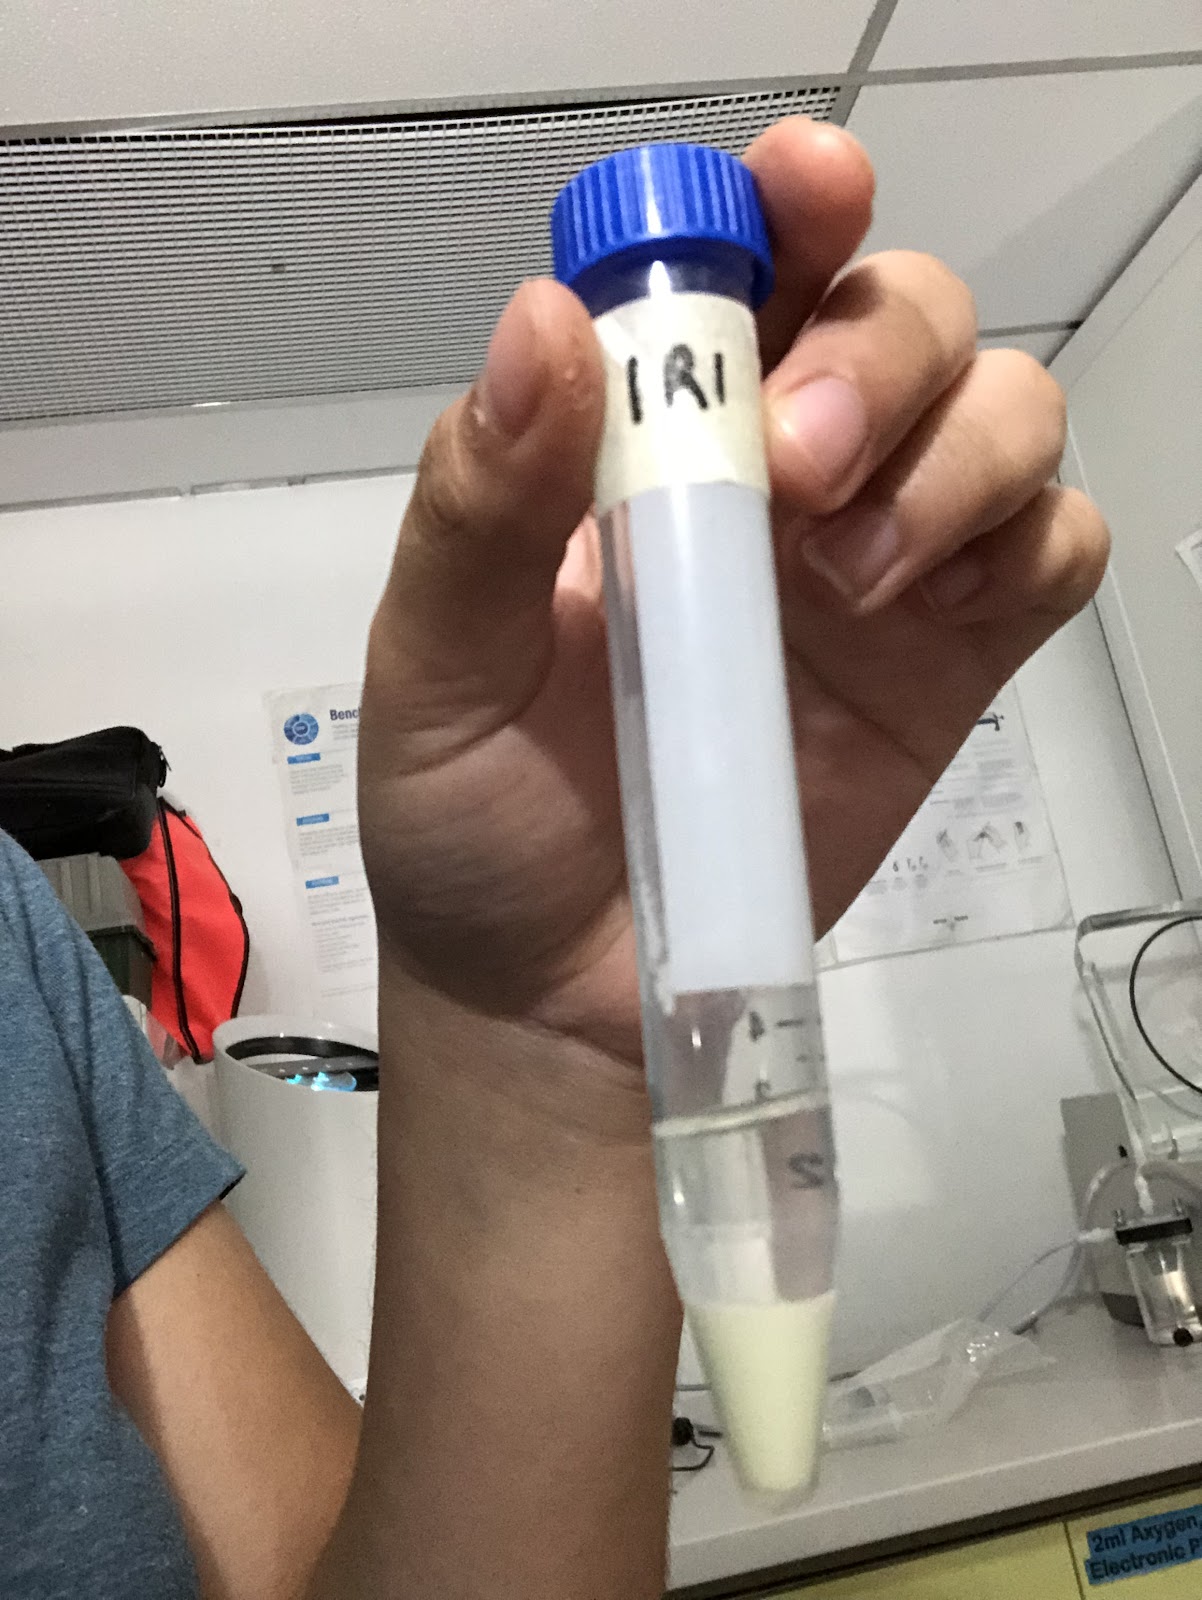
All samples are capped and then placed in the water bath for 10 minutes. After the water bath, the samples are cooled down for around 30 minutes. They are then centrifuged for 10 minutes at 3, 500 rpm. Into new 15 ml tubes, goes a yellow/clear supernatant. The carotenoid remains within the supernatant. 2 ml of acetone and 100 microliters of the dye are placed into old 15 ml tubes.

Sonification then occurs and samples turn a cloudy color. Old 15 ml tubes are centrifuged for 5 minutes and supernatant is poured into new 15 ml tubes. This process is repeated 2 more times.

Old 15 ml tubes are discarded (the powder left in them is white signifying there is little to no carotenoid left). 2 ml of PE: DE is placed into each new 15 ml tube and then each is mixed by inversion. Water is added to these tubes until the 14 ml mark is reached and then inversion occurs again. Samples are centrifuged for 5 minutes.

This next step was tricky for me because it calls for much concentration. Each 15 ml tube is next to its designated/labeled microtube and with a pipette, the yellow/green layer at the top is gathered and dispensed into a microtube. It is vital to not suck up any water during this step. Although water within the sample had a cloudy hue while the supernatant was yellow/green in color, they often mixed slightly causing their separation to be difficult. To the 15 ml tubes, 1 ml of PE: DE is added and then they are centrifuged.

For the drying process, microtubes are placed open in the concentrator plus for 15 minutes at 45 degrees C. Supernatant from 15 ml tubes goes into the dried sample in the microtubes. 1 ml of acetone is added to the dried sample.

Each microtube is inverted and placed in a cuvette for spectrophotometer reading. Absorbance is written down at 450 nm and 680 nm. After every sample, the cuvette is cleaned with acetone.

Results:
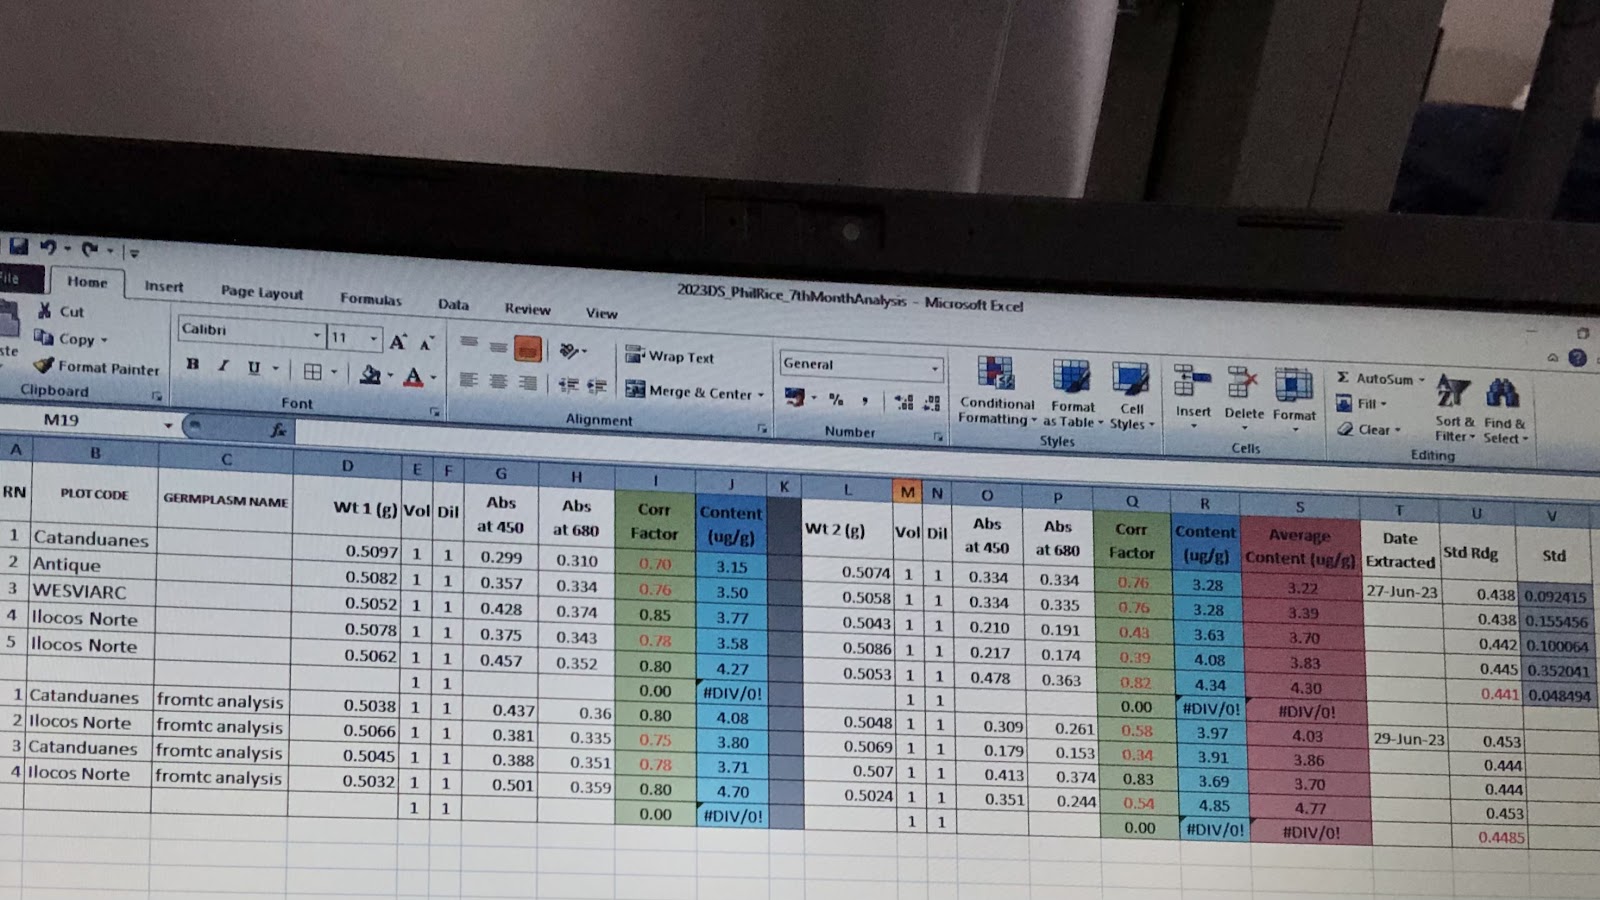

In reference to the data analysis conducted after carotenoid extraction, not much emphasis is placed upon the content (ug/g) results, instead focus is placed upon the absorbance at 450 results. Ultimately, an absorbance of 0.4 or greater at 450 nm is most favorable. Ate Crystel and Ate Elaine mentioned that if 0.4 is not reached, they will retry such samples.
I will continue to work with Golden Rice materials as I head to the Genotyping Services Laboratory!