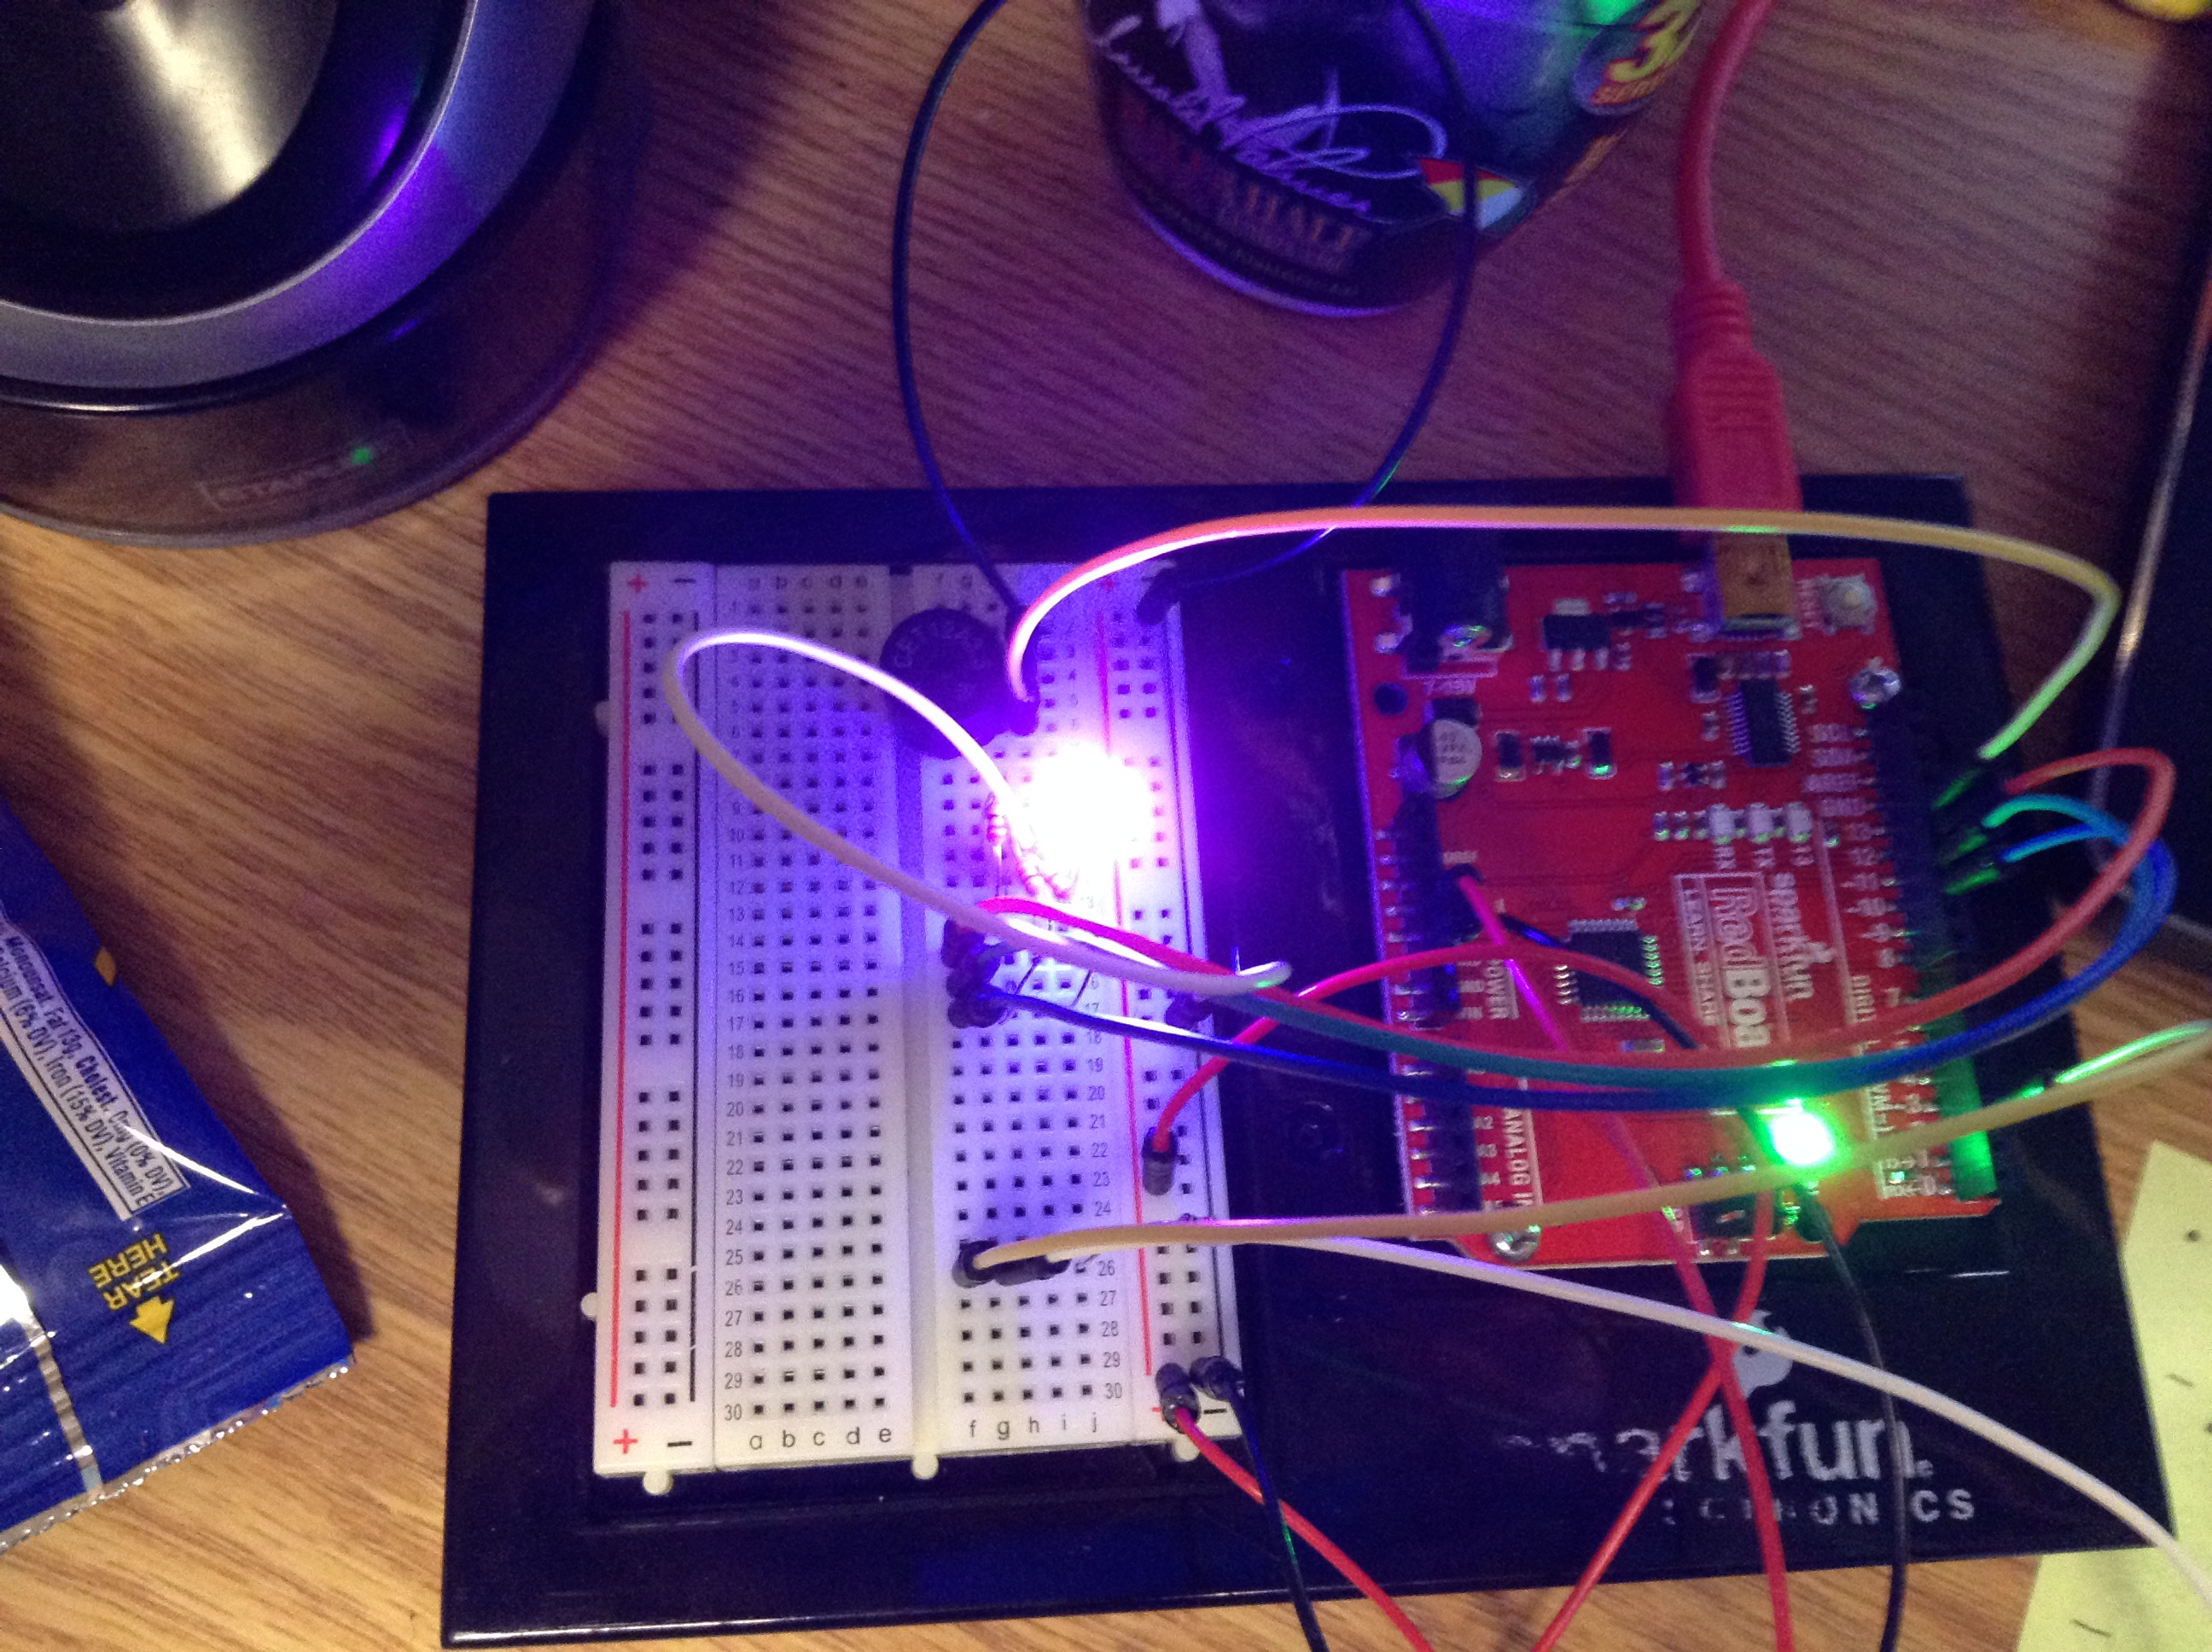
My first simple little project working with the SparkFun Redboard. Since it’s primary purpose is to light up a RGB LED and to play a song it has creatively been named the Mini Singing Light.
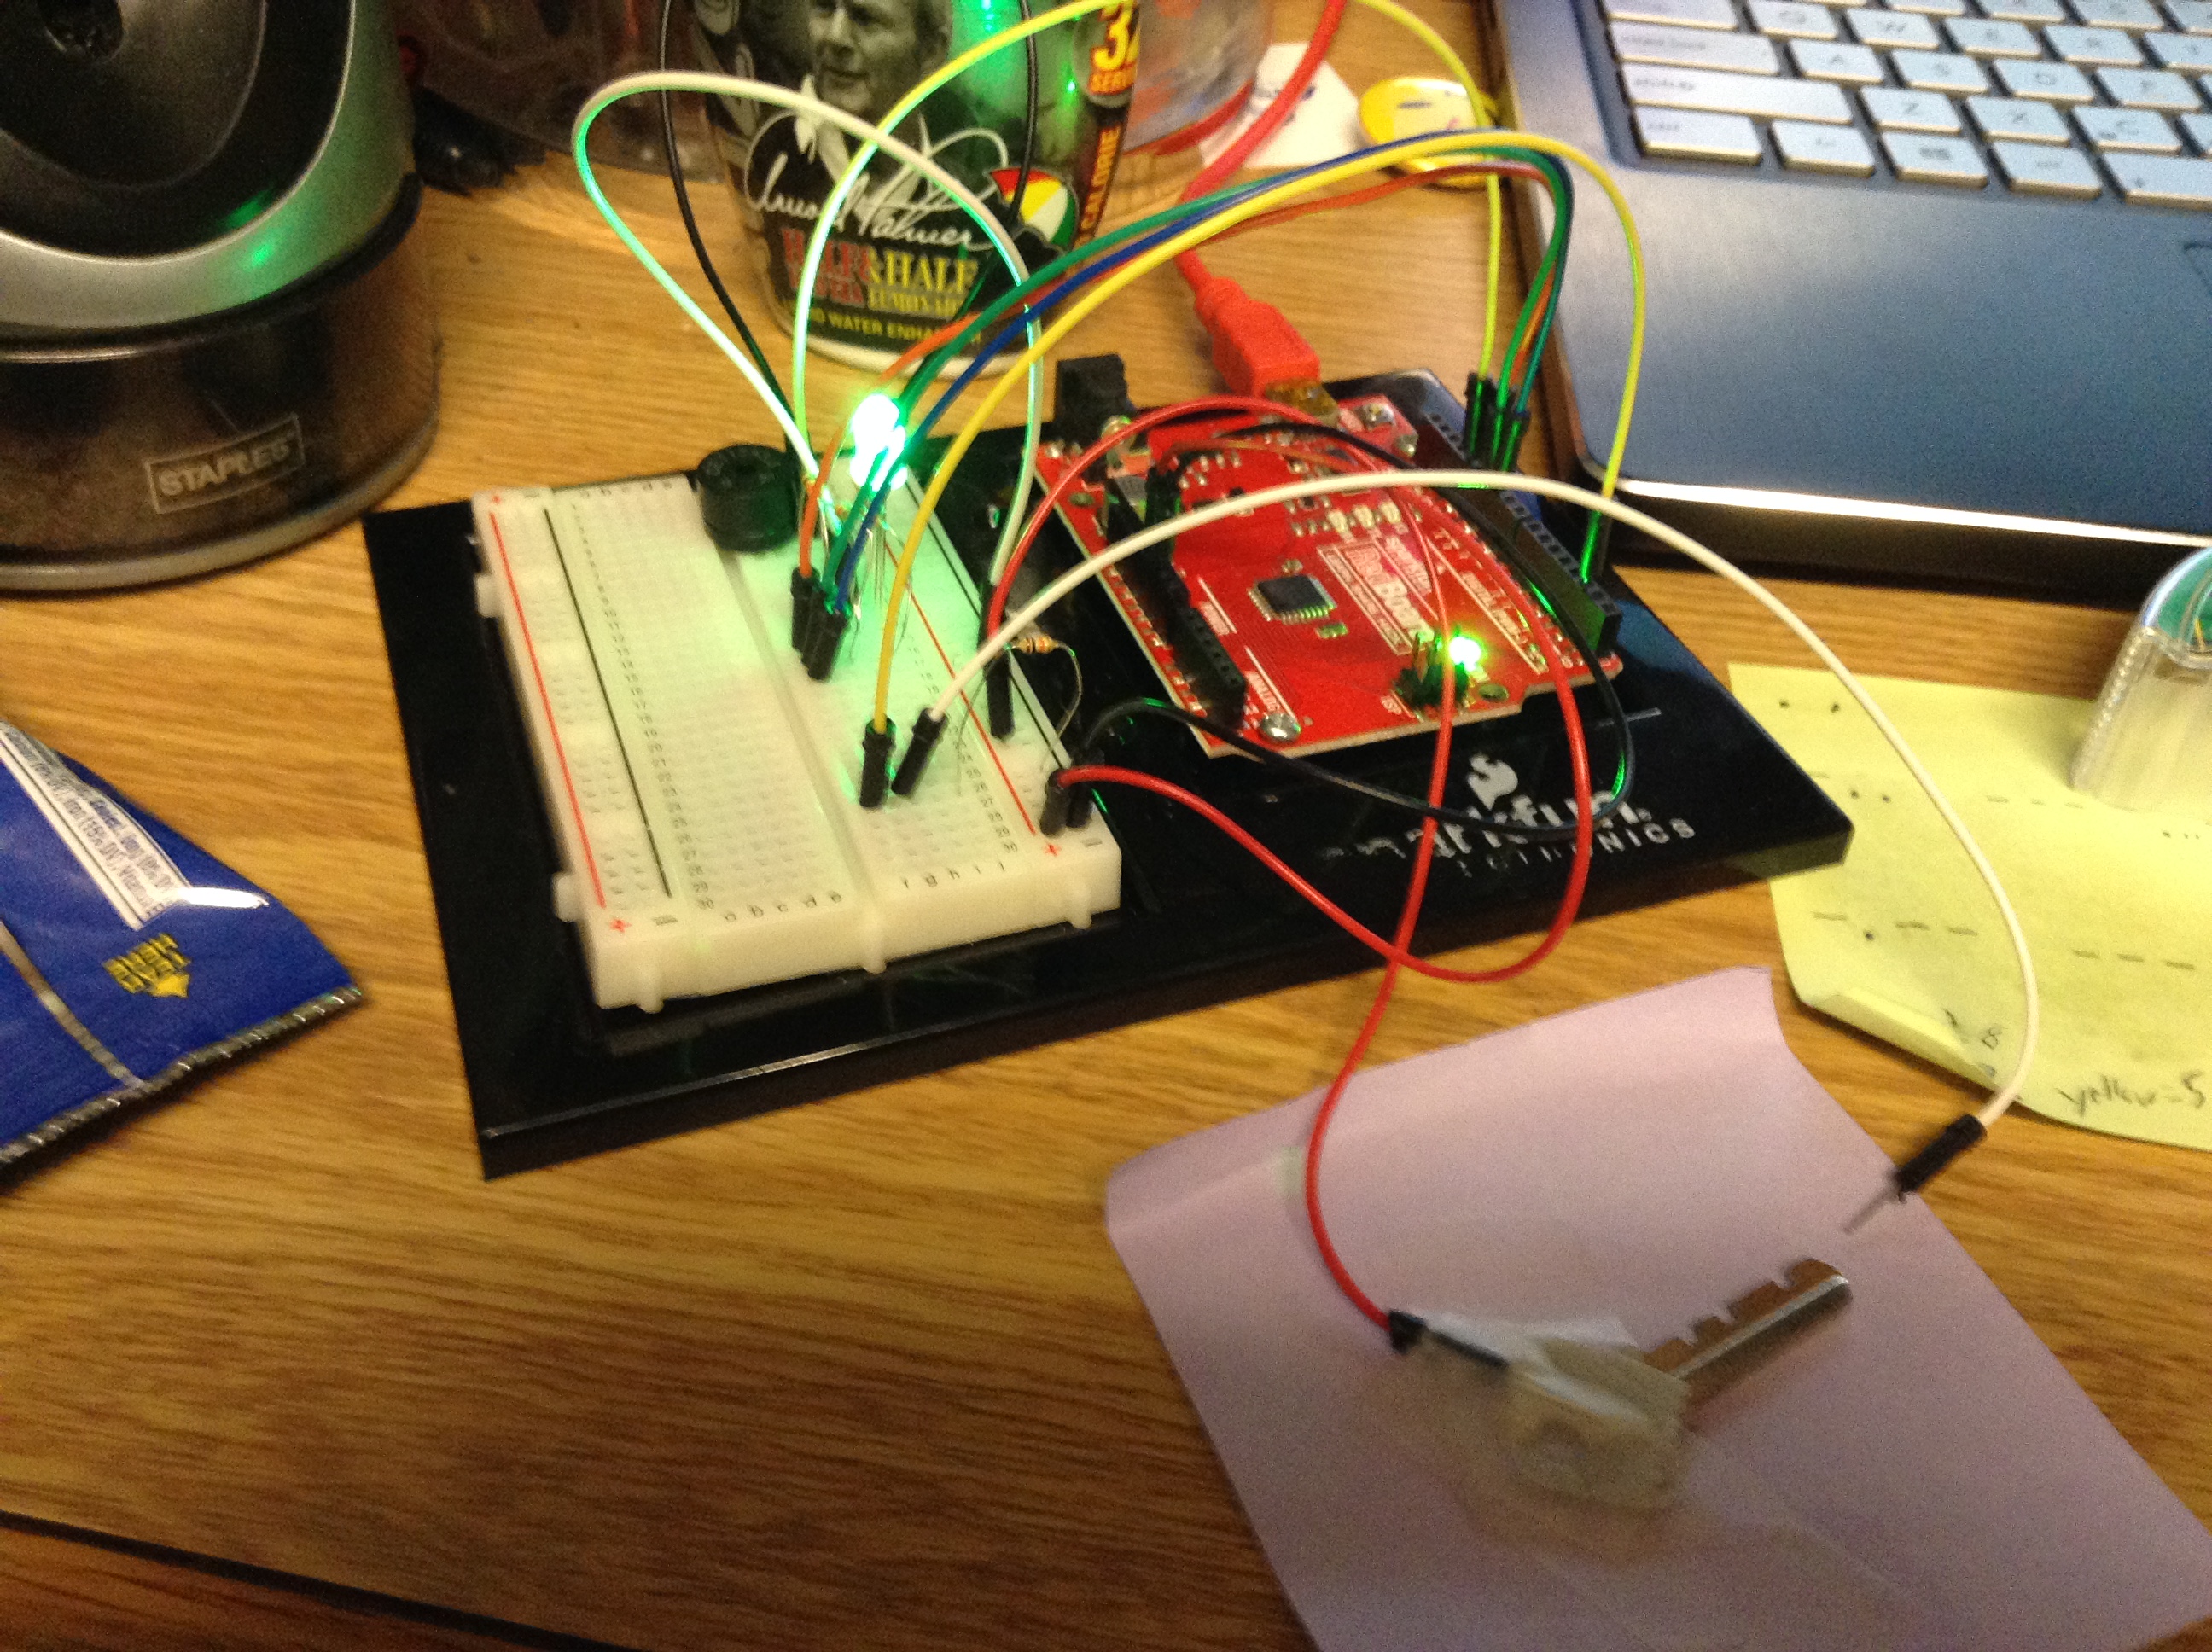
The device has an impromptu switch made from a small key taped to a post-it note. When the wire is not connected, and thus the switch is open, the RBG LED cycles through several different colors. When the switch is closed the LED turns red and and the buzzer begins to play a tune. While the switch is closed the LED remains red and flashes green along with the tune. It will continue to play for the entire time the switch is closed and then will replay as many times as possible until the switch is opened.
The assignment called for me to use a RBG LED, a switch, and whatever else I desired. After a little thought I decided that I wanted to try and use the Piezo buzzer and have the LED flash colors along with it. After a little thought I decided to try and make the device sing “Daisy Bell” as a homage to the wonderful HAL 9000. I broke this song down to its notes – as much as I could at least given that I have no musical talent at all – and entered it into code using a code from the SparkFun Inventor’s Kit as a guideline. I originally had the intention of having the LED be just red while the switch was off and then have it cycle through colors while the switch was on and the tune playing. I ran into difficulties while trying to code this so I ended up changing it to the final result.
The largest challenge came with getting the switch to work properly. Once I got the base code down for the tune and lights I noticed I had the issue that once the switch was turned on I had to listen to the entire tune play, even if I turned the switch off in the middle of the process. I tried several different methods, including trying while, for, do, and switch statements, but I was still stuck on the same issue. After seeking help I found that while I was saying I wanted the code to do a specific action if the value of switchState() changed, my code was missing the important comand to actually check if these changes were occurring, and thus was not acting correctly. After this and making the code a little cleaner I arrived at the final product seen here.
If you are interested in building your own little singing light keep reading to find parts, schematics, and code. This is a very simple project and, since I am a beginner, it is very easy for beginners to construct.
Required Parts:
(1) SparkFun Redboard/ Arduino Uno
(1) RGB LED
(1) Piezo buzzer
(1) 10k Ohm resistor
(3) 330 Ohm resistors
(11) wires
(1) switch (the assignment called for us to make our own switch, you can use a button switch or any other that you desire)
The basic schematic and sketch can be seen below.
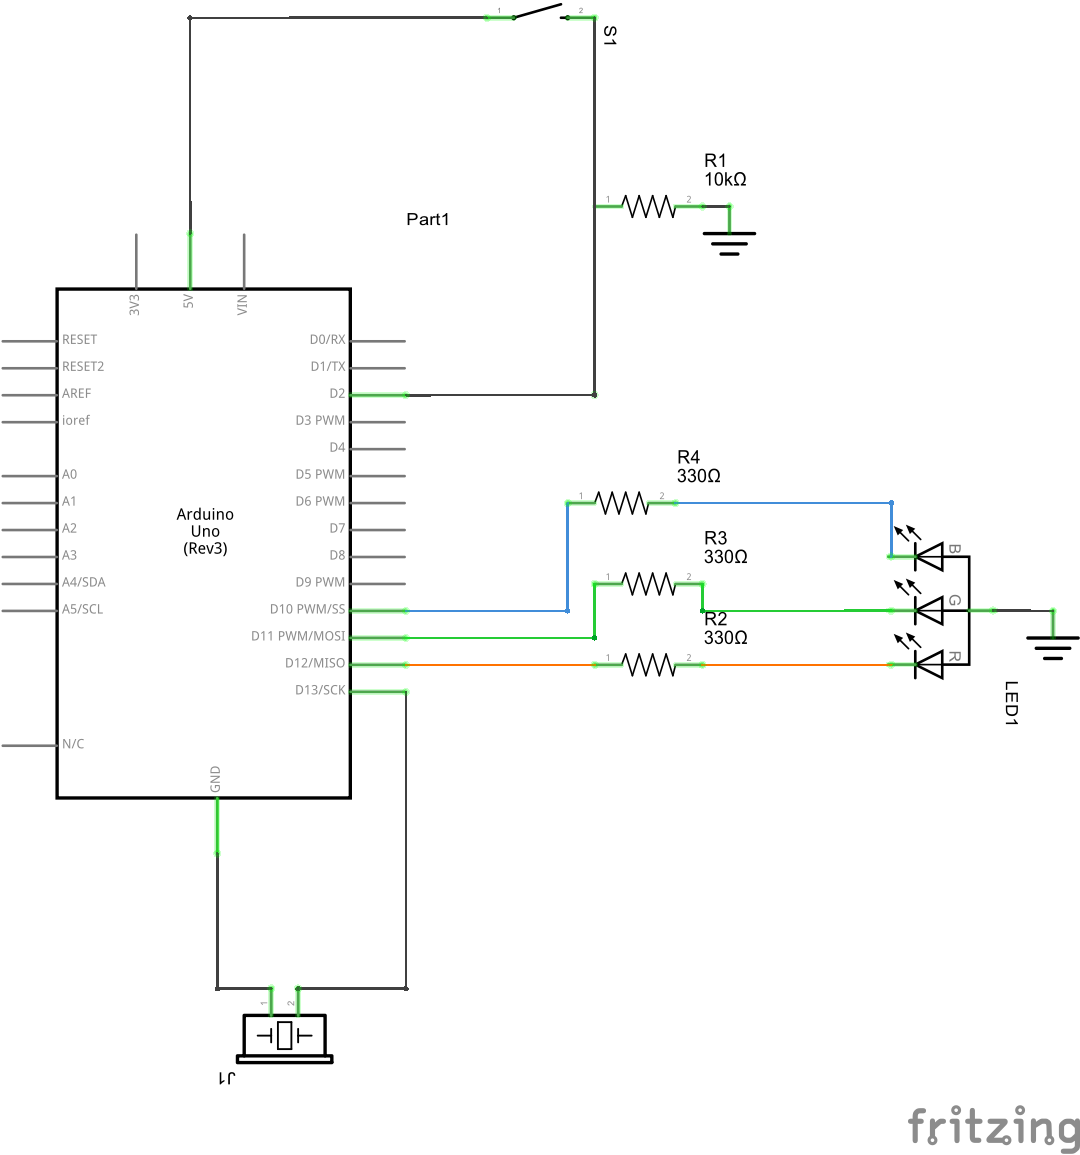
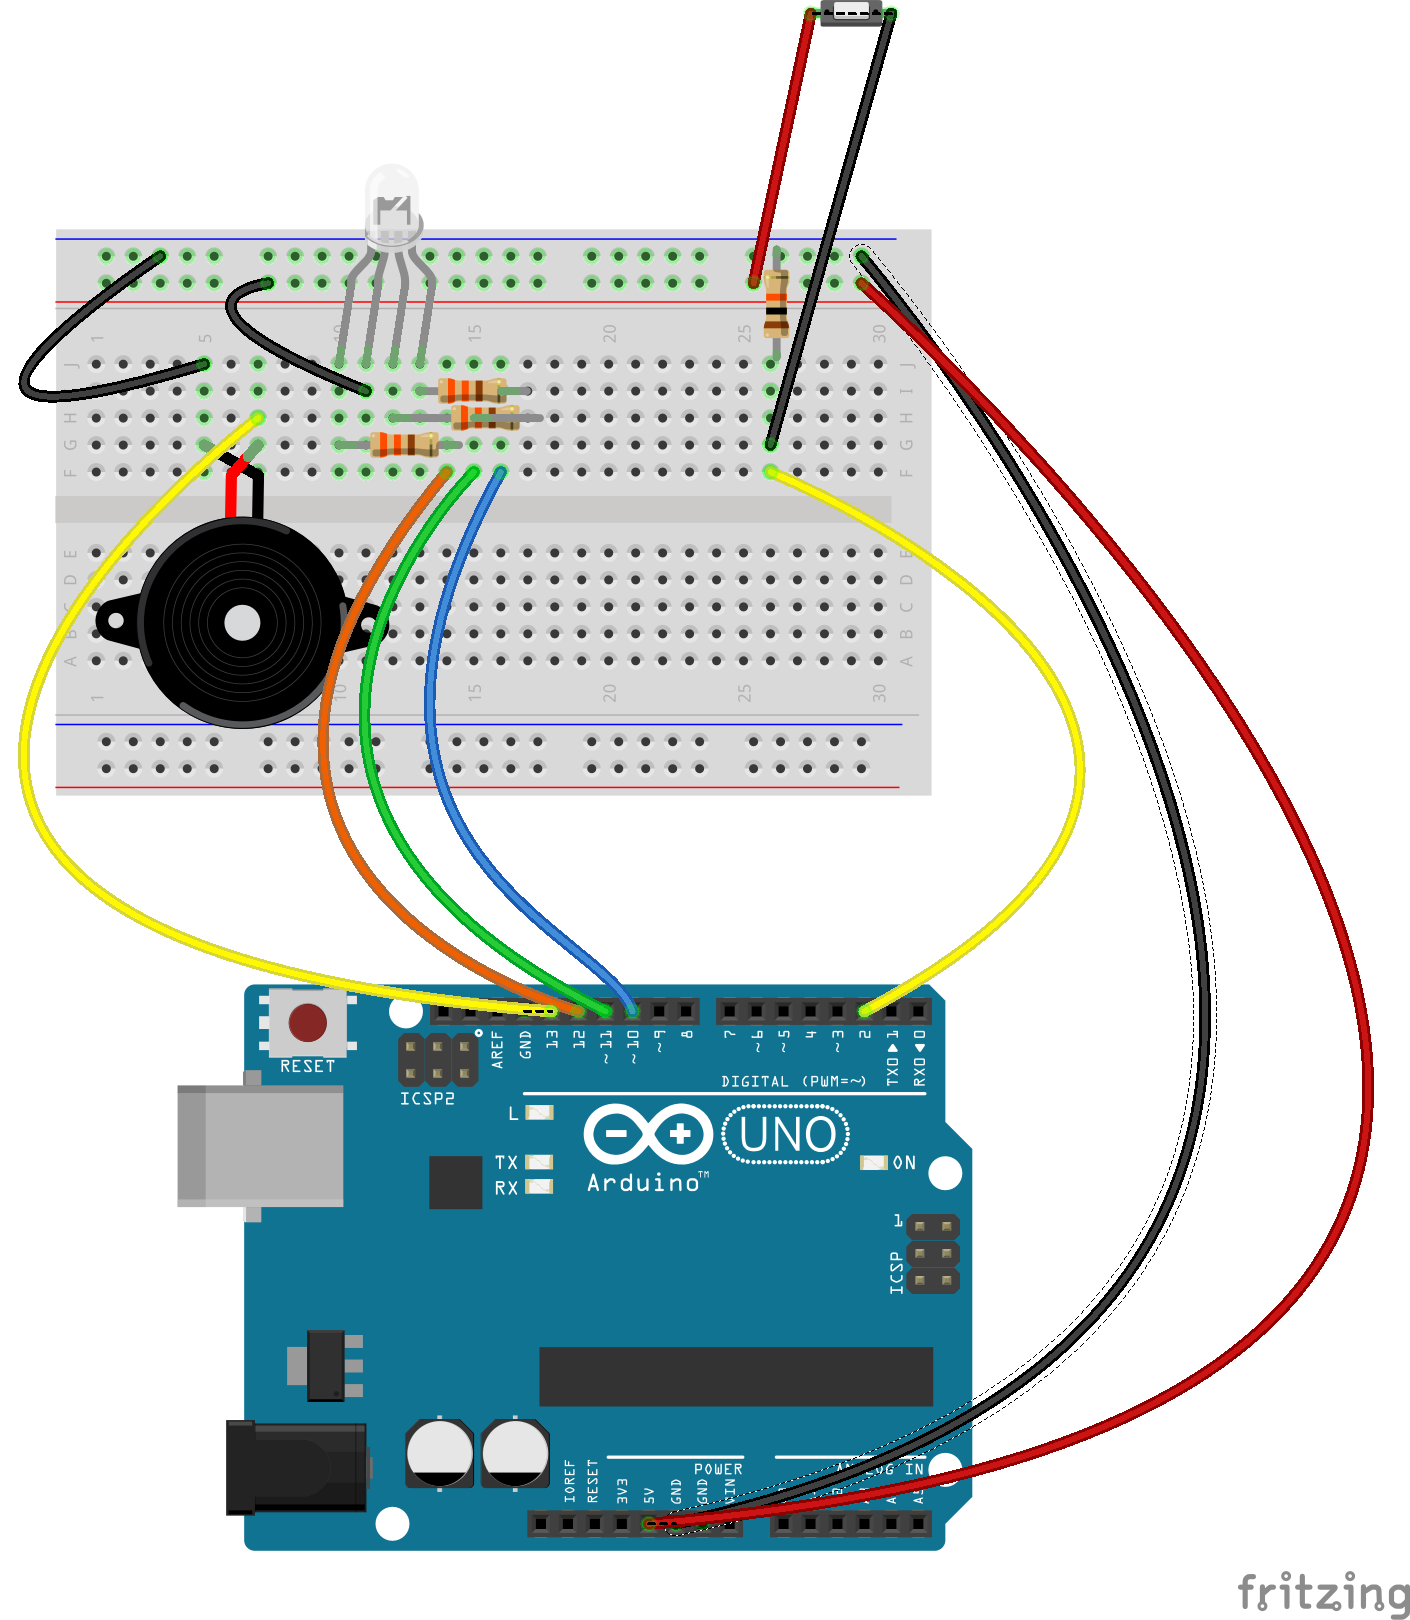
You want to hook up the switch to the 5V pin and have it run to pin 2 if closed and through the 10k Ohm resistor to ground. Make sure to run the positive end of the buzzer to pin 13 on the redboard/ Arduino and the negative to the ground if open. Then make sure to hook up the LED to the appropriate pins, red to 12, green to 11, and blue to 10. Make any necessary corrections if your LED differs the order of the colors.
The code I used is found below, copy and paste it to achieve the desired result.
[cpp]
/* Mini Singing Light
Uses a RBG LED, switch, and Piezo buzzer to create a small device that plays
a song and lights up red and green when the switch is closed and cycles through
colors while the switch is off.
*/
// Set up the variables
const int buzzer = 13;
const int red = 12;
const int green = 11;
const int blue = 10;
const int switch1 = 2;
int time = 1000;
int multiple = 2;
int previous = LOW;
// set up variables to hold the state of our switch
int switchState = digitalRead(switch1);
void setup() {
//set up our switch to be a digital input
pinMode(switch1, INPUT);
// set up our LED and buzzer to act as a digital output
pinMode(red, OUTPUT);
pinMode(green, OUTPUT);
pinMode(blue, OUTPUT);
pinMode(buzzer, OUTPUT);
}
void loop() {
//set up variables for the tune of our song
const int songLength = 54;
char notes[] = "dbgdefgegd adbgefgaba bcbadbagabgeged dgba gbabcdbgadg";
//a space represents a rest
float beats[] = {0.75,0.75,0.75,0.75,0.25,0.25,0.25,0.50,0.25,
1.25,0.25,0.75,0.75,0.75,0.75,0.25,0.25,0.25,0.5,0.25,1,0.25, //second rest
0.25,0.25,0.25,0.25,0.5,0.25,0.25,1,0.25,0.5,0.25,0.5,0.25,
0.25,0.75,0.25,0.25,0.5,0.25,0.5,0.25,0.5,0.25,0.25,0.25,0.25,0.25,
0.25,0.25,0.5,0.25,1};
int tempo = 250;
int i, duration;
/*
if the switch is on it should light up the light and play a song
if the switch is not on the LED should cycle through different colors.
*/
switch (switchState) {
case 0:
blink();
case 1:
{
digitalWrite(blue, LOW);
digitalWrite(green, LOW);
for (i = 0; i < songLength; i++)
{
switchState = digitalRead(switch1);
if (switchState == LOW) break;
duration = beats[i] * (4 * tempo);
if (notes[i] == ‘ ‘)
{
delay(duration);
}
else
{
tone(buzzer, frequency(notes[i]), duration);
digitalWrite(green, LOW);
digitalWrite(red, HIGH);
delay(duration);
digitalWrite(green, HIGH);
digitalWrite(red, LOW);
}
delay(tempo/40);
}
}
break;
}
}
// this function sets up the cycle of colors for when the switch is turned off
int blink() {
digitalWrite(green, LOW);
digitalWrite(blue, HIGH); //blue
switchState = digitalRead(switch1);
if (switchState == HIGH) return(0);
delay(time);
digitalWrite(green, HIGH); //cyan
switchState = digitalRead(switch1);
if (switchState == HIGH) return(0);
delay(time);
digitalWrite(blue, LOW); //green
switchState = digitalRead(switch1);
if (switchState == HIGH) return(0);
delay(time);
digitalWrite(red, HIGH); //yellow
switchState = digitalRead(switch1);
if (switchState == HIGH) return(0);
delay(time);
digitalWrite(blue, HIGH); //white
switchState = digitalRead(switch1);
if (switchState == HIGH) return(0);
delay(time*multiple);
digitalWrite(green, LOW);
switchState = digitalRead(switch1);
if (switchState == HIGH) return (0);
delay(time);
digitalWrite(red, LOW);
return (1);
}
//This function takes the note character and returns the necessary frequency in Hz
//This code was adapted from example Circuit_11 of the
//SparkFun Inventor’s Guide: Verson 3.2 <sparkfun.com/sikcode>
int frequency(char note) {
int i;
const int numNotes = 8;
char names[] = {‘c’, ‘d’, ‘e’, ‘f’, ‘g’, ‘a’, ‘b’, ‘C’ };
int frequencies[] = {262, 294, 330, 349, 392, 440, 494, 523};
for (i = 0; i < numNotes; i++)
{
if (names[i] == note)
{
return(frequencies[i]);
}
}
return(0);
}
// song adaption from "Daisy Bell" composed by Harry Darce. 1892.
//Copyright: Creative Commons Attribute 3.0
//<http://www.8notes.com/scores/4117.asp>
[/cpp]
The code is relatively straight forward and if you read the comments it should explain any confusion.
Being new to writing code it is more than likely that the code could be simplified. As I talked about earlier, the process of getting the code to recognize when the switch was on or off was the largest challenge.
The code and set up should work with any song as well, though you will have to break down the notes and beats to fit it correctly. Also you may need to play around with the tempo. It may also be more interesting to include more LEDs so that the light show is more fancy.
Thanks for reading my friend. And may the force be with you 🙂
“Daisy Bell” composed by Harry Dacre. 1892 Copyright: Creative Commons Attribute 3.0 http://www.8notes.com/scores/4117.asp#info